

Introduction
We will make a Study Lamp using Arduino in this Arduino project tutorial. To make this project will use two sensors to automatically switch on and off the study lamp using Arduino. Students in schools and colleges can utilize this automation for better and more efficient management of electricity while studying.
Supplies
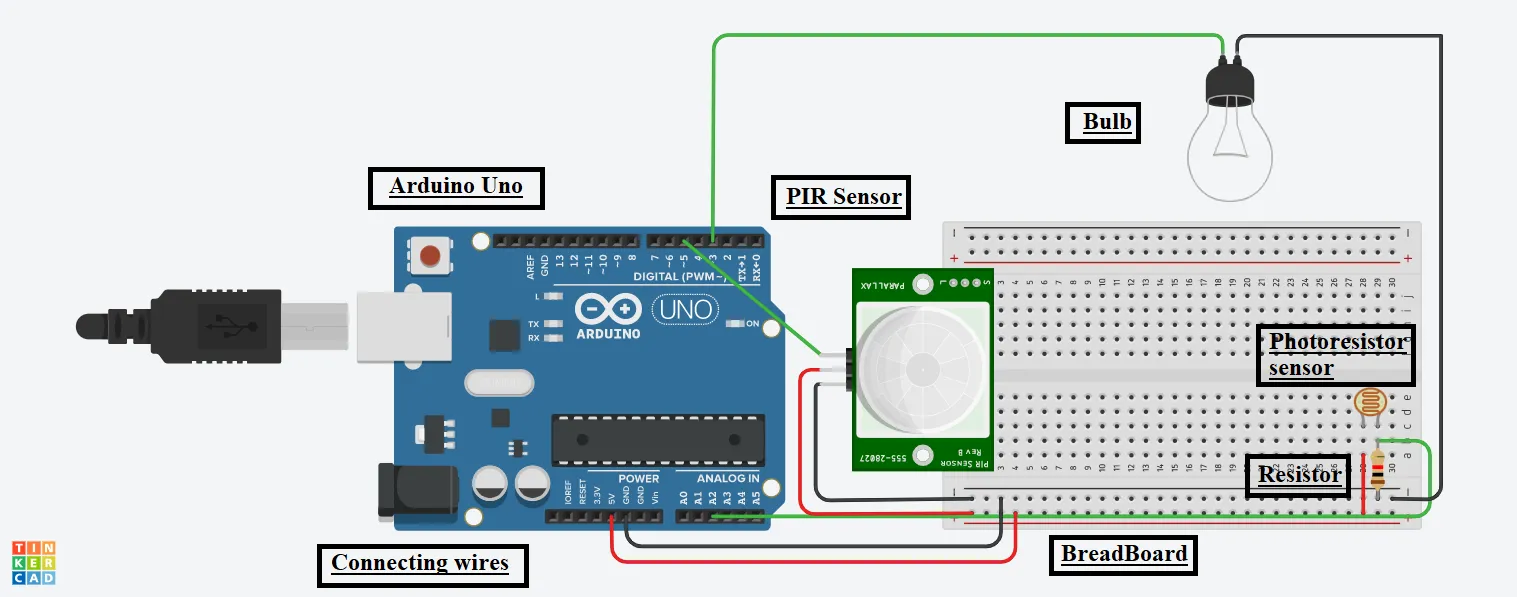
In order to make a Study Lamp using Arduino, we will require the following components:
Components
- Arduino Uno R3
- PhotoResistor Sensor
- PIR Sensor
- 1 Bulb
- 1 Resistor
- 1 small BreadBoard
- Connecting wires
Circuit Diagram
Steps To Make A Study Lamp Using Arduino
Step 1: Gather all the components on the Digital Board or Physical Table.
Bulb:
Step 2: Connect the Cathode terminal of it to the GND pin of the Arduino.
Step 3: Connect the Second terminal of it to the 3 number pin of the Arduino.
PIR Sensor:
Step 4: Connect the Ground terminal of it to the GND pin of the Arduino.
Step 5: Connect the Power terminal of it to the 5V pin of the Arduino.
Step 6: Connect the Signal terminal of it to the 5-number pin of the Arduino.
PhotoResistor Sensor:
Step 7: Connect the first terminal of it to the GND pin of the Arduino thru a resistor and the same with the A2 pin of the Arduino.
Step 8: Connect the second terminal of it to the 5V pin of the Arduino.
Source Code
void setup()

{

pinMode(3, OUTPUT);

pinMode(2, INPUT);

pinMode(5, INPUT);

}

void loop()

{

int time = analogRead(A2);

int presence = digitalRead(5);


digitalWrite(3, LOW);

if(time == LOW && presence == HIGH)

{

digitalWrite(3, HIGH);

delay(1000);

}

else

{

digitalWrite(3, LOW);

}

}
Explanation of the Code
1. In the setup function, we have configured the pins of the Arduino for input & output purposes to glow the bulb and take input from the sensors.
2. In the loop function, we are reading the value of the two sensors and storing it in a variable.
3. Then, we use the if-else statement to glow the bulb accordingly if the condition is satisfied.
4. Finally, The delay function takes the value of time in milliseconds.
Output
We will get the following output on the successful completion of the project.
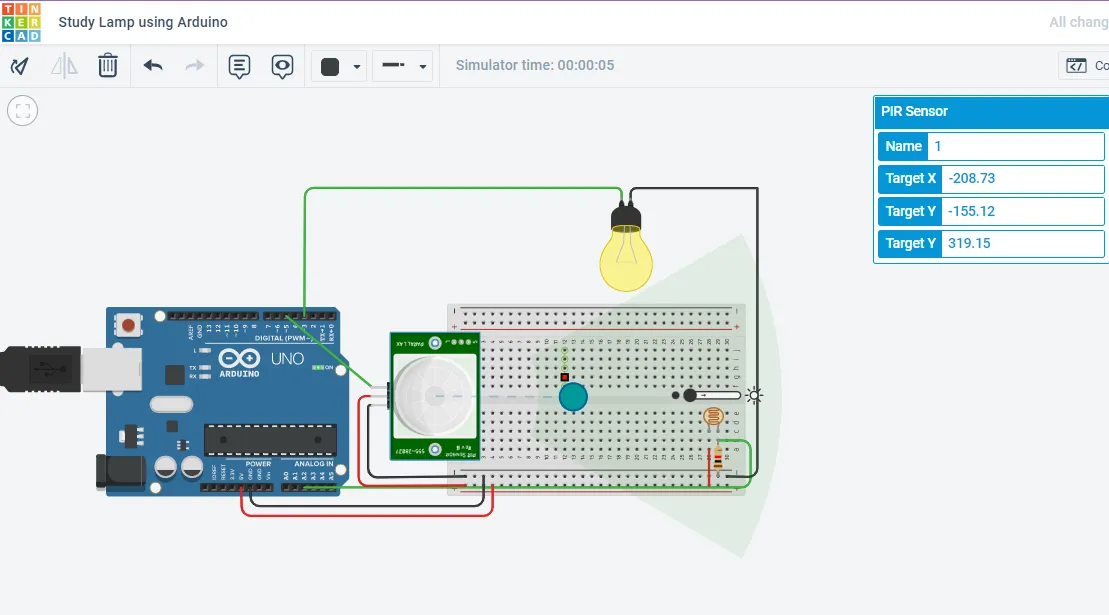
On starting the simulation, the BULB will glow if there is no light in the room and there’s someone near the table.