

Introduction of the Project
Today, we are going to explore one feature of OpenCV, which is to get a single coloured image from a colourful image. Wanna make a colourful image greyish in colour? Try it once using the power of OpenCV. This Python Program to create a single coloured image using OpenCV Library allows you to successfully make a multi-colour image into a single-colour image with a smaller code displayed in the upcoming sections.
Requirements
1. VSCode or any python IDE
2. OpenCV library and Numpy must be preinstalled on your pc
3. An image to get a single coloured image.
Steps To Create A Single Coloured Image Using OpenCV Library
Step 1: Install OpenCV and NumPy if you don’t have them in your system.
Paste the below line of command in your command prompt and press enter.
pip install opencv-python
pip install numpy
Step 2: Paste the below piece of code in your editor/IDE.
Source Code
# Import modules

import numpy as np

import cv2


# Here, we are reading an image using opencv

imgOriginal = cv2.imread('Videos/image.png')


# Resizing the image

img = cv2.resize(imgOriginal, (500, 600))


# Here, we are opening an image using opencv

cv2.imshow('Coloured Image', img)


# To get image height and width

height, width, channels = img.shape


# To convert the BGR image to HSV colour space

hsv = cv2.cvtColor(img, cv2.COLOR_BGR2HSV)


# To obtain the grayscale image of the original image

gray = cv2.cvtColor(img, cv2.COLOR_BGR2GRAY)


# To set the bounds for the red hue

lower_red = np.array([160,100,50])

upper_red = np.array([180,255,255])


# To create a mask using the bounds set

mask = cv2.inRange(hsv, lower_red, upper_red)


# To create an inverse of the mask

mask_inv = cv2.bitwise_not(mask)


# To filter only the red colour from the original image using the mask(foreground)

res = cv2.bitwise_and(img, img, mask=mask)


# To filter the regions containing colours other than red from the grayscale image(background)

background = cv2.bitwise_and(gray, gray, mask = mask_inv)


# To convert the one channelled grayscale background to a three channelled image

background = np.stack((background,)*3, axis=-1)


# To add the foreground and the background

img_ca = cv2.add(res, background)


# To show grey shaded image

cv2.imshow('@Grey_Shaded_Image', img_ca)


# To save image using opencv

cv2.imwrite('Grey Shaded Image.jpg', img_ca)


# This waits for a pressed key

cv2.waitKey(0)


# To destroy all GUI windows

cv2.destroyAllWindows()
Explanation Of The Code
In the beginning, we imported two modules, OpenCV and NumPy.
1. Now, we open the original coloured image from its path and show it, using imread() and imshow() functions.
2. After that, we resize the image using resize function.
3. Then, we convert the BRG image to grayscale using mathematics, bitwise_and(), bitwise_not(), and add() functions.
4. Now, we are showing and saving the grey shaded image using imshow() and imwrite() functions.
5. Finally, we are closing all the GUI windows using the destroy all windows function.
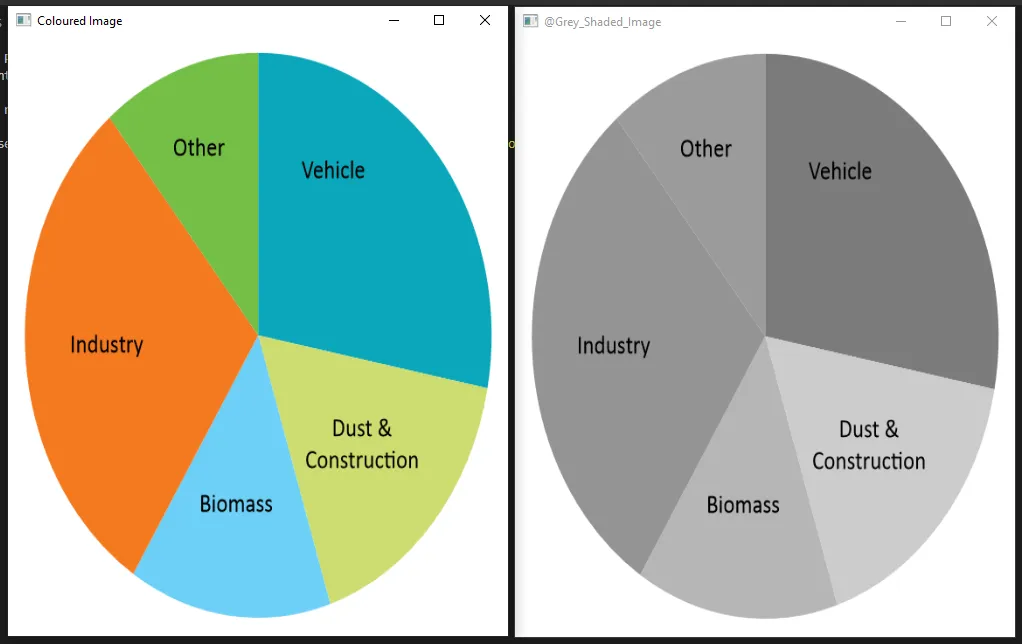
Output
The Colourful and single coloured image is shown below using this single coloured image using OpenCV Library python code.
Things to Remember
- Install both the modules prior to pasting the code.
- Write the name of the modules in lowercase only.