

Introduction
In this Arduino tutorial, we will learn to make a Traffic management system using Arduino Uno R3. In this project, the LEDs of three different colours will blink simultaneously after a particular period of time.
You can purchase the components online or from any electronics center to do physical projects.
Whereas to do the online projects, we can use the TinkerCad website.
Supplies
To do this traffic management system using Arduino, we will require the following components:
Components
- Arduino Uno R3
- 3 LEDs (Green, Red, and Yellow)
- 1 Small Breadboard
- 1 Green wire
- 5 Black wires
- 1 Yellow wire
- 1 Red wire
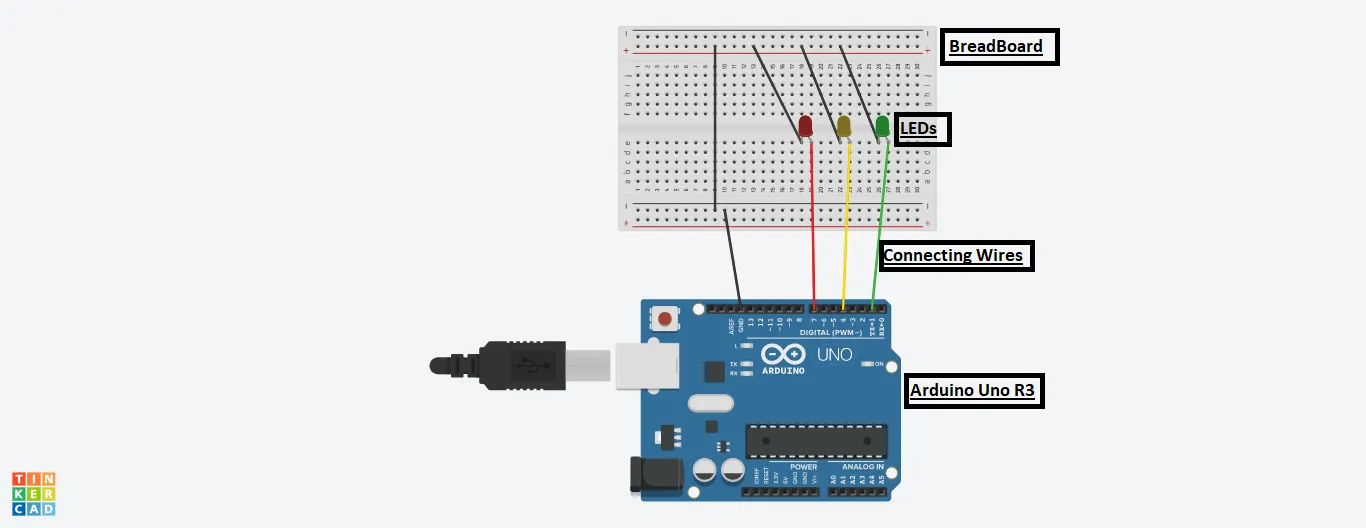
Circuit Diagram
Steps To Create A Traffic Management System Using Arduino
Step 1: Gather all the components on the Digital Board or Physical Table.
Step 2: Place all the three LEDs on BreadBoard.
Step 3: Connect the Anode part of the LEDs to the Arduino using three coloured wires to pin numbers 7,4 and 1 of Arduino, respectively.
Step 4: Connect the cathode part of all the three LEDs to the grounding of the Arduino Uno using black coloured wire.
Step 5: The circuit is ready, input the source code and switch on the Arduino to run it.
Source Code
int ledRed = 7;

int ledYellow = 4;

int ledGreen = 1;

void setup()

{

pinMode(ledRed, OUTPUT);

pinMode(ledYellow, OUTPUT);

pinMode(ledGreen, OUTPUT);

}

void loop()

{

digitalWrite(ledRed, HIGH);

delay(1000);

digitalWrite(ledRed, LOW);


digitalWrite(ledYellow, HIGH);

delay(1000);

digitalWrite(ledYellow, LOW);


digitalWrite(ledGreen, HIGH);

delay(1000);

digitalWrite(ledGreen, LOW);

}
Explanation of the Code
To make the Traffic management system, we need to input the code.
1. In the beginning, we initialized three variables in the name of LEDs to their respective pin numbers to which they are connected.
2. We have used two functions in this code, namely, setup() and loop().
3. The setup function is used to declare from which LED pin number we are producing the output.
4. In the loop function, we are producing the output as high for each pin number for some amount of time using the delay function. And thereafter, making it low.
5. The delay will fix the time period till which the LED will glow. The time is in milliseconds.
Output
We will get the following output on the successful completion of the project.
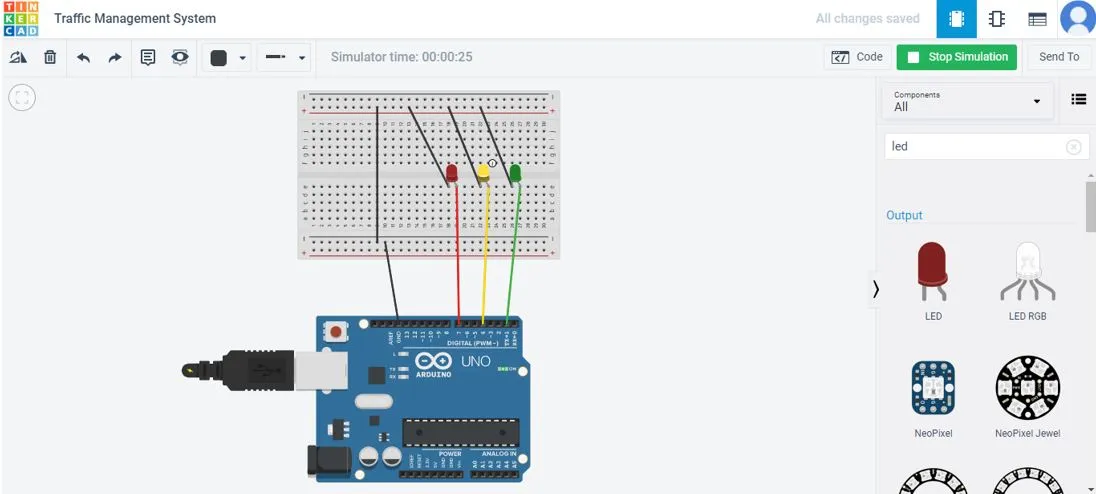
The LEDs will glow as per the delay function, just one after the other.